Hey all. It’s been a few days since I have been up and streaming. Sorry about that. I got a nasty stomach bug (but not covid) that just had me not feeling it. I’ll be back to streams on Monday evening, though, likely with Phasmophobia and, of course, the Tuesday EQ. Hopefully I’ll be able to stream Song of Horror soon. I’ve played some of the first chapter and the game is really good. It is just also really resource intensive and my computer can’t handle it and streaming at the same time.
I’m going to see how recording goes. If I can’t stream the game, I can at least put up play-throughs on YouTube.
Using the Fear Spell to drive your enemy before and listen to their lamentations while you damage them with your Damage over Time spells and your pet’s melee attacks.
Gathering additional mobs to kill you and possibly other characters.
Fear Kiting is one of the most important skills for a Necromancer to master. So naturally, I want to include it in the Leveling Guide. While at Level 4 baby Aliyanna is going to have limited need and capability in doing it, it is a skill that I need to work on, since it has been a while since I had to use it.
Fear Kiting is not as simple as “pull creature, fear, dot, rinse, repeat.” If you think casting your Fear and DoTs are all there is to this technique, you’re doing to get yourself and probably other characters killed.
The reason?
Trains – the long line of mobs just waiting to kill you.
Unlike it’s close cousin, Agro Kiting, Fear Kiting gives you little control over where the mob you’re fighting will go. Once you cast Fear, you are at the whim of mob pathing (which can be funky in EQ) and the speed of the mob, which is only reduced by the snare effect of your Darkness spell.
Effective Fear Kiting, therefore, requires finesse and some degree of tactical skill.
When I go Fear Kiting, I am looking for,
A mob that is strong enough to require Fear Kiting to take down (otherwise, I can just let my pet tank) and weak enough to not resist my Fear Spell
A relatively clear area where the Feared mob can flee
An easy escape route if anything goes wrong
Why do I need an escape route if I have Shadow Step or Gate? Simple: spell interruptions.
For practicing my kiting, I chose the area along the Commonlands boundary wall where the EC tunnel is. This provided me,
A fairly wide area with little to no mob traffic to pull mobs into
Two close zone lines to choose from
Nearby merchants in the EC tunnel
A variety of nearby mobs to choose from in a variety of levels
While merchants are just a convenience, the other things are ideal and required for effective Fear Kiting.
The Commonlands is just a preference of mine. Everquest has other zones that a new Necromancer can begin practicing their Fear Kiting skills as well. However, the Commonlands is preferred because of multiple conveniences it offers as well as the abundance of cats, wolves, bears, and spiders, all of whom are important for gathering Tailoring supplies.
I mostly created this video to demonstrate the basics of Fear Kiting. It will be a few more levels before I can really use these skills. As you can see, my Darkness spell is weak and both it and my Fear spell are short-lived. However, the practice will serve me well later when Fear Kiting will be the difference between success and death. While my success at Fear Kiting here is limited, starting around Level 12, it will be key to some of the areas we will be looking at for levelling through our teens.
So the first thing to decide when you’re playing a Dark Elf Necromancer is where you want to spend your Newbie Levels. Remember, we’re playing on a Progression Server here (Aradune) so you won’t have things like the Plane of Knowledge and the Tutorial Gloomingdeep until those things open. So …
You have a few good choices. You can,
Stay in Nektulos Forest for your first several levels. The advantage is that you have your home city close and you can generally level to around 10 or so throughout the forest or leave there for the Commonlands. Disadvantage is navigating Neriak.
Search for a teleport to Toxxula Forest and hunt the Paineel Newbie Zone. The advantage here is that Bone Chips abound and you can hit the Warrens around level 5 for some great XP and factions. Disadvantage is you don’t really have a place nearby to train or buy spells. If you have a buddy or want to take the time to have a secondary character to work as a runner (including 2-boxing, which is allowed with limits on Aradune), then you can do that. If you’re planning to switch between characters on one computer, there are a couple of places you can tuck away to drop bags for buying/selling to pick up.
So I am back to playing Everquest. It is going to become part of my Nostalgia rotation. However, I don’t want to merely have a nostalgia stream on a nostalgia server. No, I want to triple-dose memory lane here. Since my new Aliyanna is only level 3 and still firmly stuck in the newbie zones, I’m in an ideal position.
I’m going to create a Dark Elf Necromancer Leveling Guide.
Well, I’m going to stream it. Most of it will be what I have already learned in playing a Dark Elf Necromancer and what I will be researching as we go along. As I stream, I will add onto the guide here with some notes and thoughts about my progress outside the stream, especially since I will likely be playing between streams as well to save on some of the tedium.
I have 2 goals with this guide.
To recreate the Definitive Dark Elf Leveling Guide as I remember it back in the day
To create a leveling experience that includes some exploration and just fun
So I will see you soon for the first installment: The Newbie Levels
This is not because of anything to do with the game (really). Okay, I was upset about water changes, but that is not too big of a deal. Not enough to not play, anyway. In truth, life got very hectic. I moved, started working from home writing and editing, homeschooling my child …
Oh, and there was that brief period where I could not get the launcher to work. But I fixed that a month or so ago.
Anyway, Landmark has gone through some huge changes over the past few months and they look exciting. So, I am going to be back exploring and enjoying. As I do, I will be posting up some of my player experiences here. It looks like Open Beta is coming soon, so it is all very exciting.
So, we have some pretty big updates that came out of Landmark.
I’ve not been playing of late. I’ve been busy with writing and the site, so there simply has not been the time. I got on for a few minutes today, however, intending to pay rent on my claim and check out a few things.
Combat is being rolled out, starting with PVP. I was going to check out how to set up combat arenas on the claim, when I saw that they managed to, in one swoop, make glass uber cool and mess it up completely.
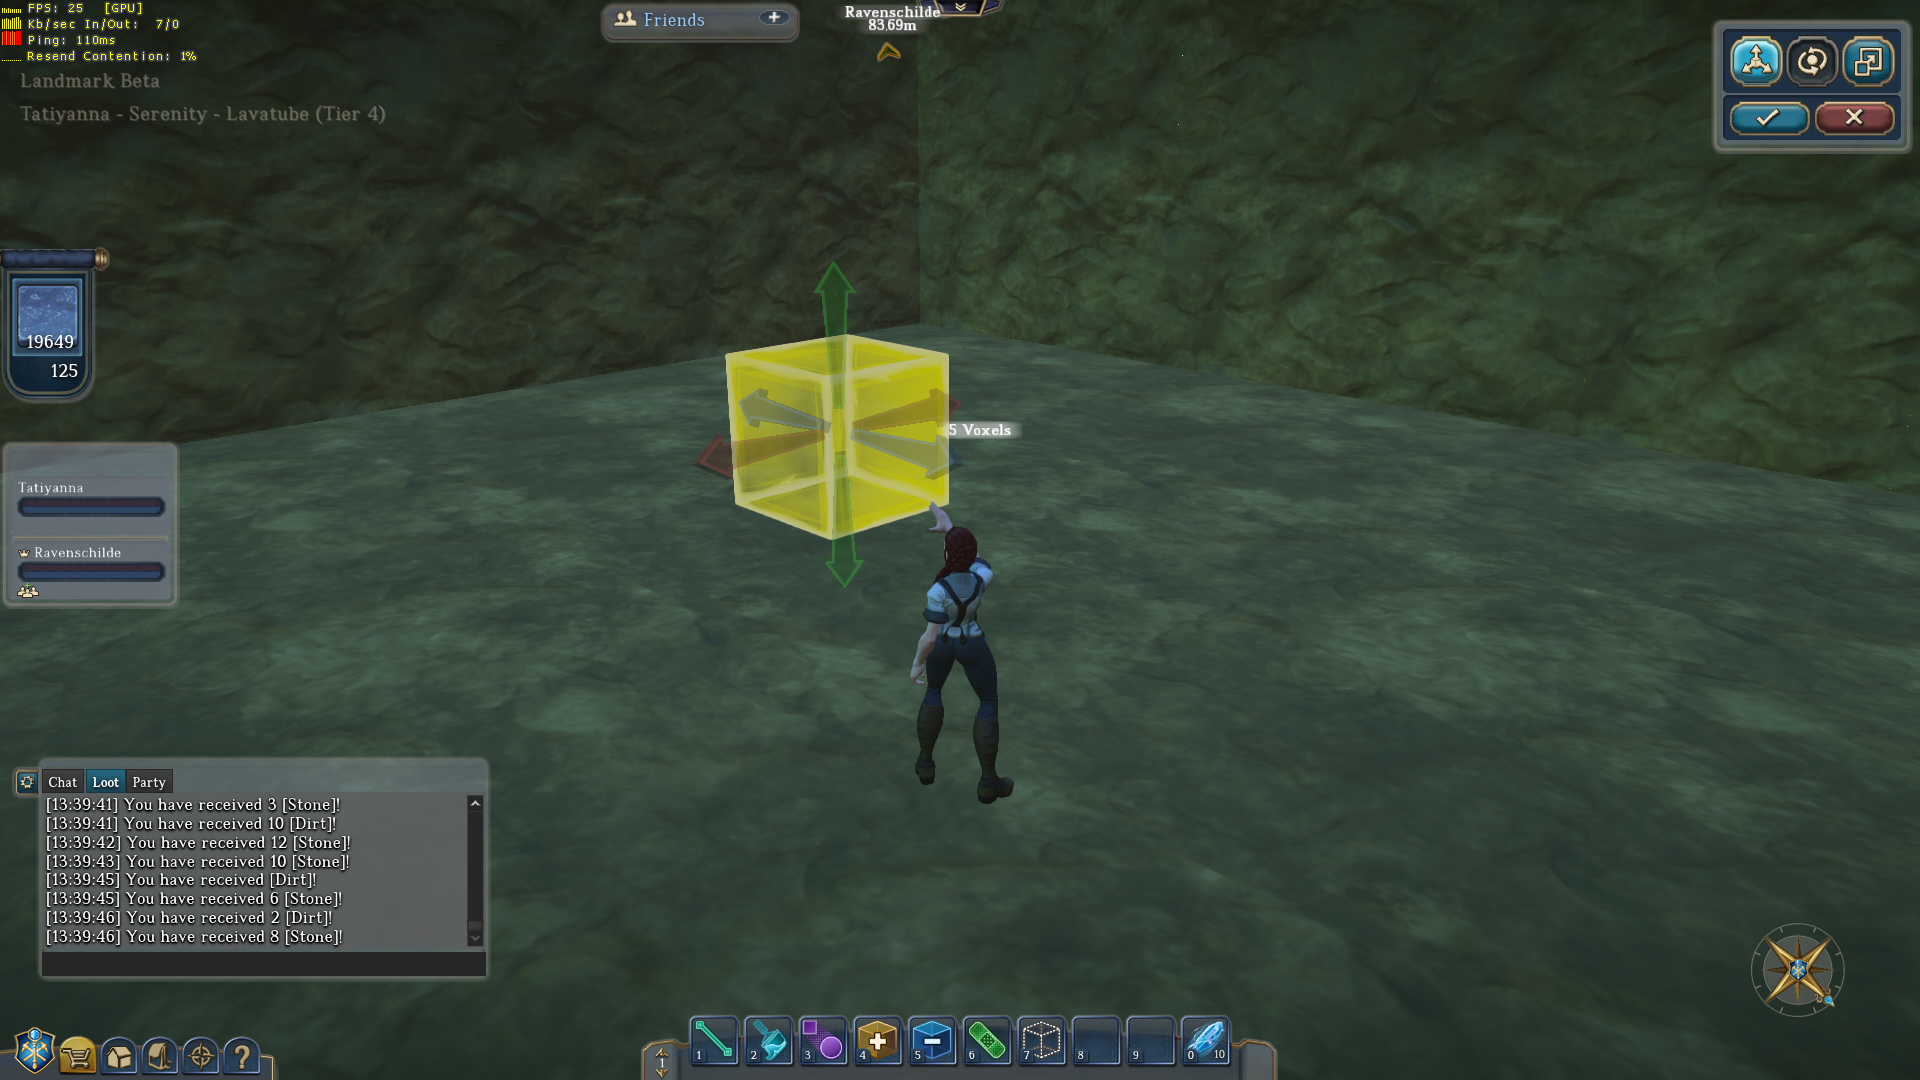
It’s a plain 1×1 voxel that has been warped using “negative” space. This small voxel looks like a rod and can be used to create a lot of different shapes. If you will recall my pretty book shelves in Needs More Library, I used anti-voxel planks to create the shelves.
So, when I say they are created using “negative” space, what do I mean?
Well ….
Picture time.
You’ll start by adding a 5×5 volume voxel in whatever texture you want. I actually suggest the Stucco, which can be found in dirt, because it is white. You can use the Paint Tool to change the texture to whatever you want once you’ve built your item. In this I used water, but that’s just because at the time I was playing around with water to see if anything else happened when making Anti-voxels.
Other than the nature of water making it difficult to select the anti-voxels, nothing, in case you are wondering.
By the way, Dave apparently does not approve of the word “patch” to refer to game release updates. Which is kind of funny, actually, from the 7/31 Landmark Live, because Collette refers to them as the preferred Update and then immediately goes back to Patch. I think Dave might have taken notice more except for things like “In a moment, Dave will hop over to the other computer.”
Dave, by the way, injured his foot pretty good on vacation a few weeks back.
Anyway, this week had new updates for Landmark and this Patch was a nice one.
Still no combat and death. We do have some fun things.
Guilds
Glass voxel materials (I guess I need to go gather sand … sigh)
Food props
So, today, I’m going to take a look at some of the new updates and see what we’ve got.
I debated with myself on whether or not I wanted to have a Guide Post just covering the building tools themselves and decided … kinda. Since I’m not doing a video tutorial, I found it really hard to put together anything nice without it being over-simplified or jumbled. Understanding the tools are important but … well, there’s a lot of stuff. The best thing to do is just play around with the different tools to learn what you can do with them. However, I did promise that from time to time I would be linking to some of the videos that helped me along in the game. So, meet Strahz.
Now, a couple of important notes.
This was made during Alpha, so some things have changed with the tools. For example, you can change voxel size you will add, delete, etc, by using the mouse wheel on a 1-voxel increment rather than the old increments available before.
The select tool looks a little different, but for the most part acts the same.
The smooth tool is way different and has a little more versatility. While the basics of the smooth tool – what you use it for – are the same, just how to use it has changed. And really, the best way to know those changes is to study up on a specific technique it is used for.
Note, however, when making things like columns, no need to spread your select tool out around the item to get round edges.
The Templates UI is a little different now, but pretty intuitive.
Two tools are missing because they were not in this part of Alpha:
The paint tool, which just allows you to change the texture of something you have already made (useful if you have stairs and want to change the texture from one type of stone to another).
The line tool, which lets you create voxel strings in different volume sizes from one area to another and allows you to make diagonal shapes quick and easy.
And that’s the basics for the tools. Play around. Later, I’m going to be looking at anti-voxels, mico-voxels, mega voxels, and some of the things you can do to play around with them.